^^See what I did there…….
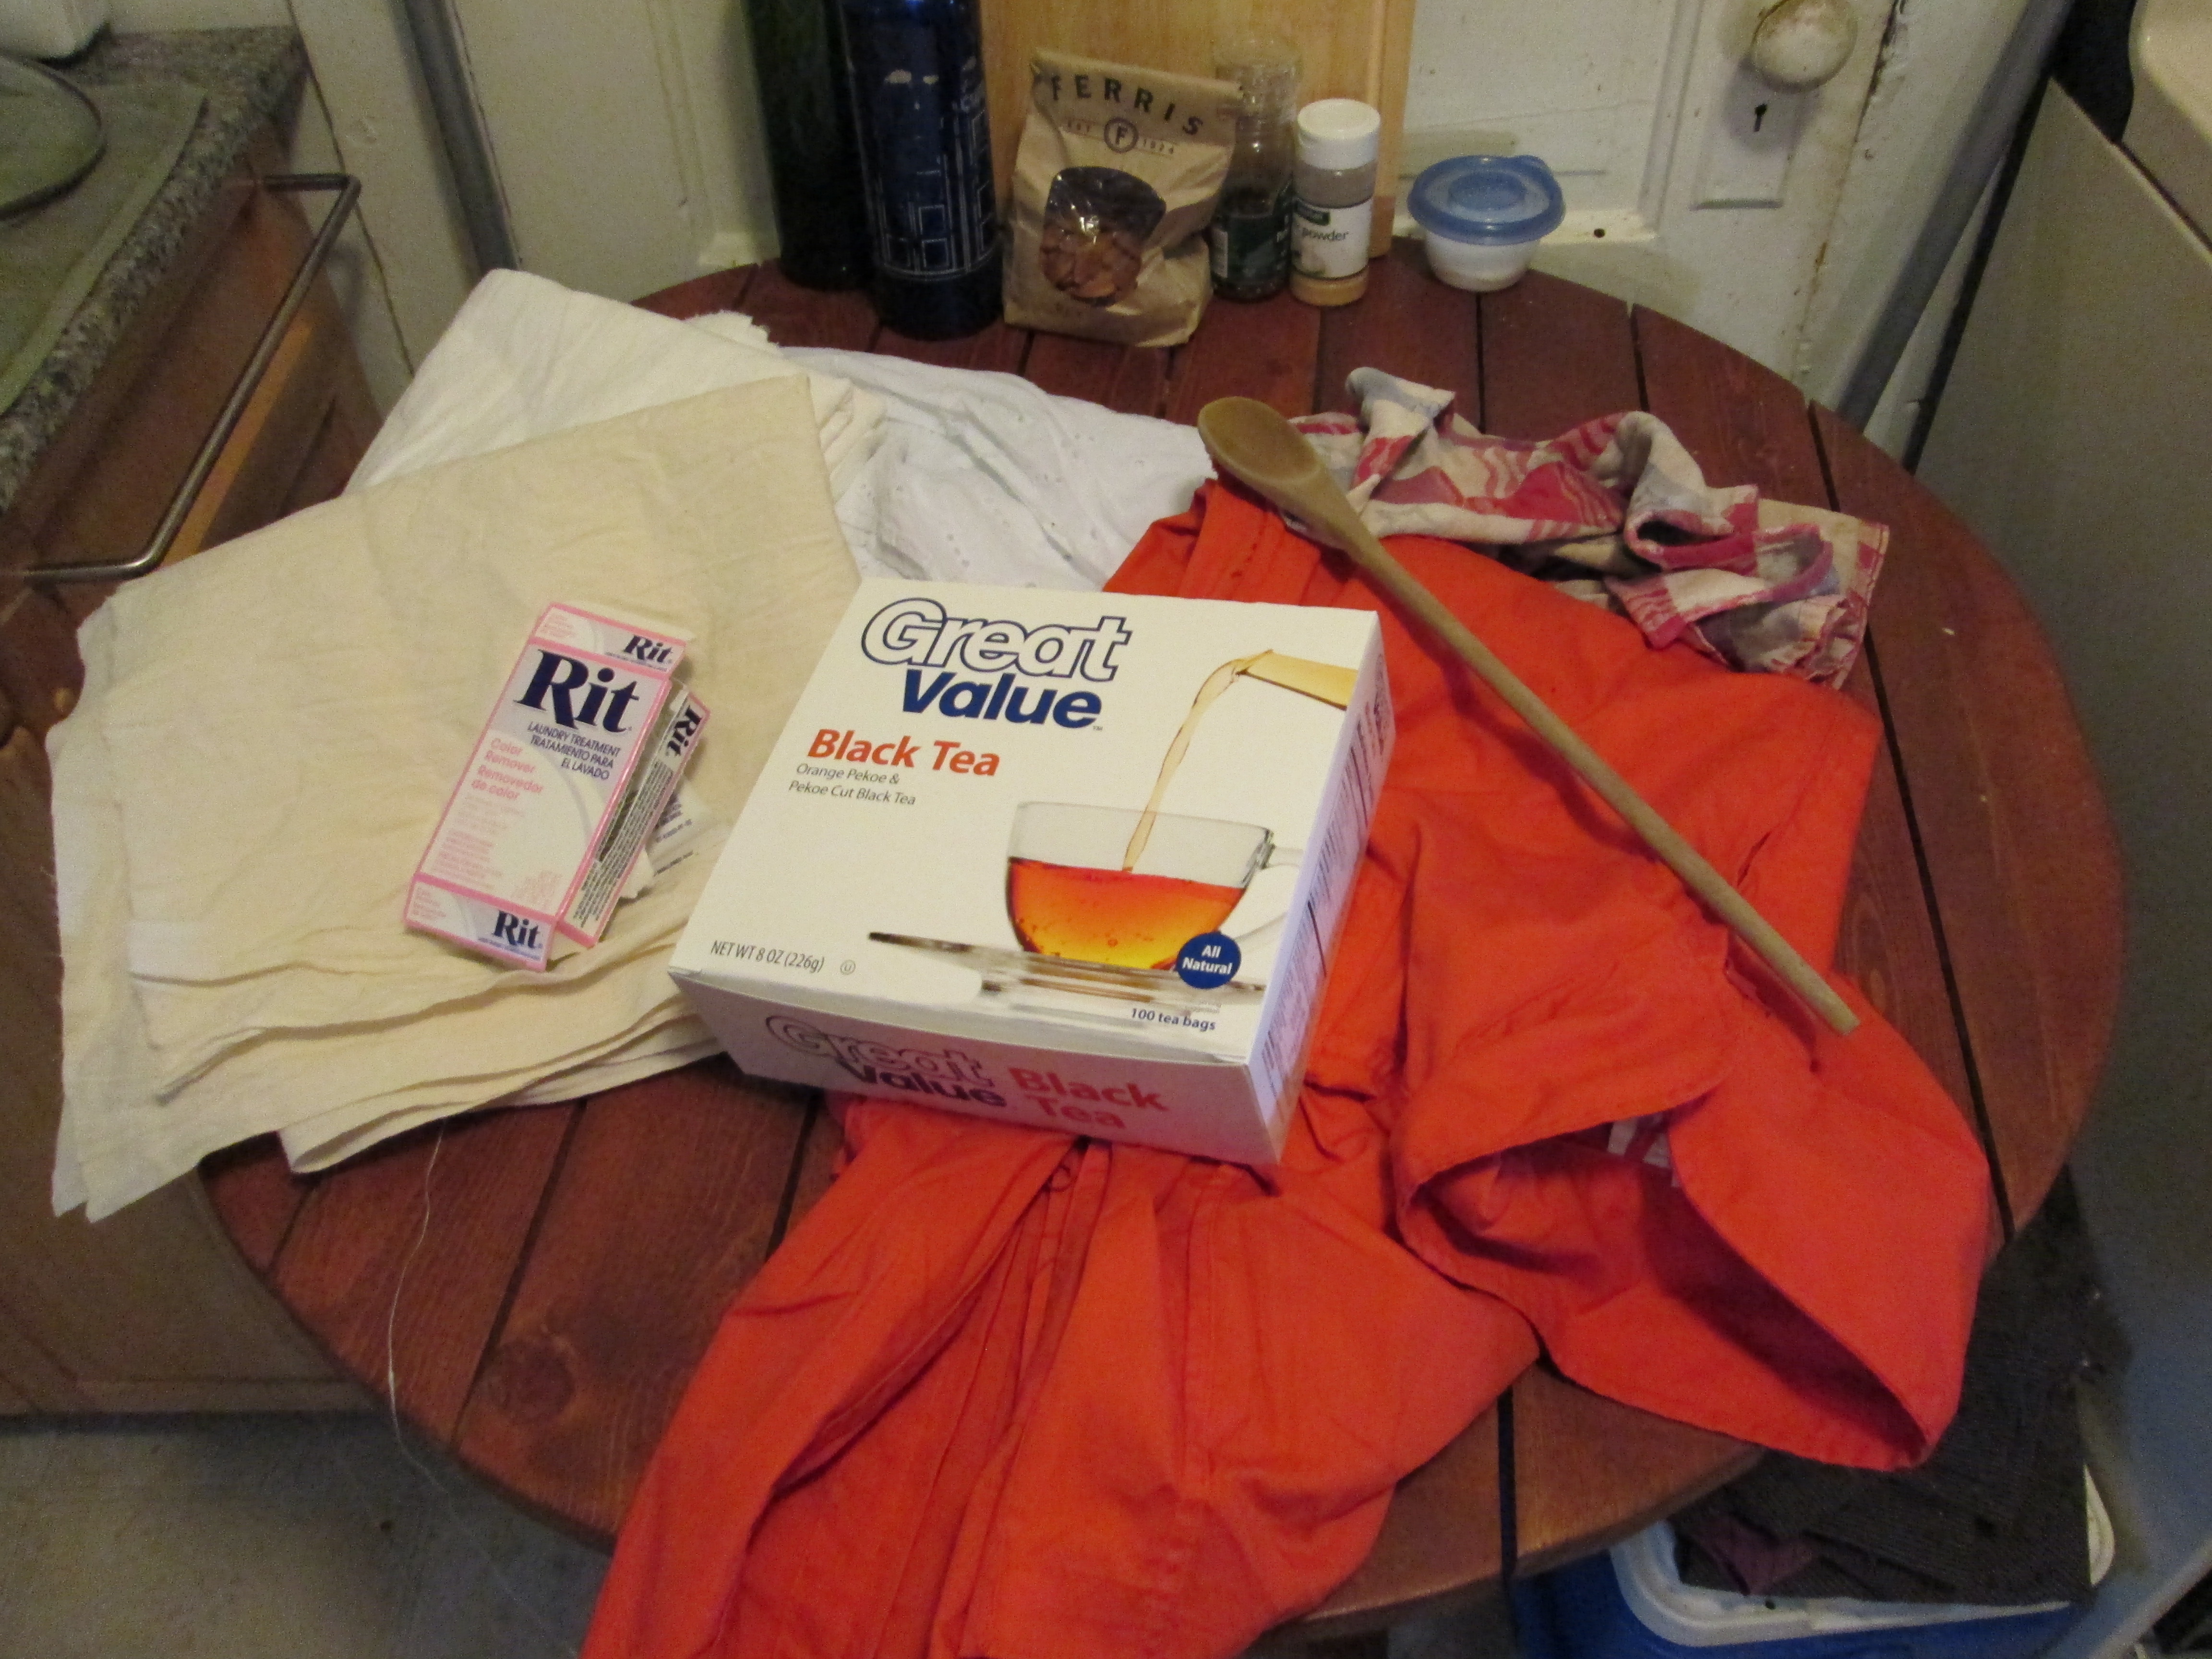
In case it wasn’t obvious, I did a bunch of dye batches to black out Wash’s TAC vest, darken/age is flight suit, and darken/age the petticoat materials for Femme Eight. If anyone is interested in a more in-depth tutorial on tea-dyeing, just let me know!
I didn’t get any photos of dyeing the TAC vest because it was pretty quick and straight-forward. (And I may have forgotten to charge my camera battery *sic*). It took really well, except for one pocket and a few patches that I forgot to rip seams out of before hand. Those were easily fixed with some thinned black paint, so Wash’s vest is good to go!
First thing I did was use a color-removing bath (an anti-dye bath) to remove and lighten up the flight suit and take away some of the brilliant orange. Again, no photos because it was a quick process and done while the vest was being dyed (and the camera was still charging). Next up was making a tea bath for the flight suit and raw fabrics.


My dye set-up. The pot on the left contains the tea bath, the pot on the right is just a storage pot for the wet materials as they are moved between the dye bath and the sink. It was originally used to lighten the flight suit, pre-tea bath.
And of course my trusty mug of drinkable tea.

Flight suit soaking in the bath. I’m pretty sure the lace and linen petticoat fabric are buried under there too. As time went on and items were taken in and out, the bath weakened.

After the fabric is taken out of the bath and rinsed in a slowly cooling rinse, it is left to soak in a cool vinegar bath for about 15 min to help set the dye.

This was after the first tea bath, which it cook in for about an hour, but was shared with the petticoat fabric, so it was weaker. It’s still a bit too light and not dingy enough. Back to the tea bath we go!

After the second tea bath, I’m much happier with the color. It’s pretty close and I don’t think I want to tempt fate to try and get it any closer and muck it up. All that is left is adding the black trimming.
WIP Progress
Ianto
Good progress on Ianto. He’s good enough for TARDIS; anything else I can find/get done is bonus.
Source and find correct pinstripe for Season 1 waistcoat, then build.- Source correct earpiece
- Source correct, or very similar, Season 1 tie.
- Order and get fitted for Black pinstripe suit (as similar to Seasons 2 & 3 as possible)
- Find Dress shirts for Seasons 2 & 3 (Royal Blue, Pink, & Deep Purple)
- Find Coordinating Ties to aforementioned Dress shirts.
Find Dress Shoes – something comfortable for Cons (I had seriously considered just wearing my black Chucks, but Ianto would have scowled at me.)Find/Buy Black Leather Belt- Hand Gun (Found the exact model, just need the funds. Currently borrowing a friend’s)
Stun Gun (Next big project!)Parts acquired, just need to build.- Coffee Cup (Debating on getting a ‘Ianto’s Coffee‘ mug)
- Pocketwatch/Stopwatch (Needs more research)
Wash
Yeah, so Wash is done. I’m wearing him for Halloween provided the weather is nice.

Just need to find a good model of the Serenity to fly around.
Jack
I may not be getting my Doctor Detector hand until after TARDIS, but that’s ok; he’s in a good place. Jack is my back-up for a cold Halloween.
- Pick up 1-2 more shirts (light blue and either a 2nd dark blue or go for the sea foam green with red braces)
Build silver earpieceParts acquired, just need to build.- Build ‘Doctor Detector’ jar.
- Finish building leather Vortex Manipulator
Find/Buy new boots.
Femme Eight
I have made a TON of progress on Eight, pretty much spent several days just knocking out pieces and listening to podcasts.

Completed Corset (My first one!)

Corset with Bustle (Dat Victorian Booty)

Added Petticoat. So. Many. Ruffles.

Added Overskirt.
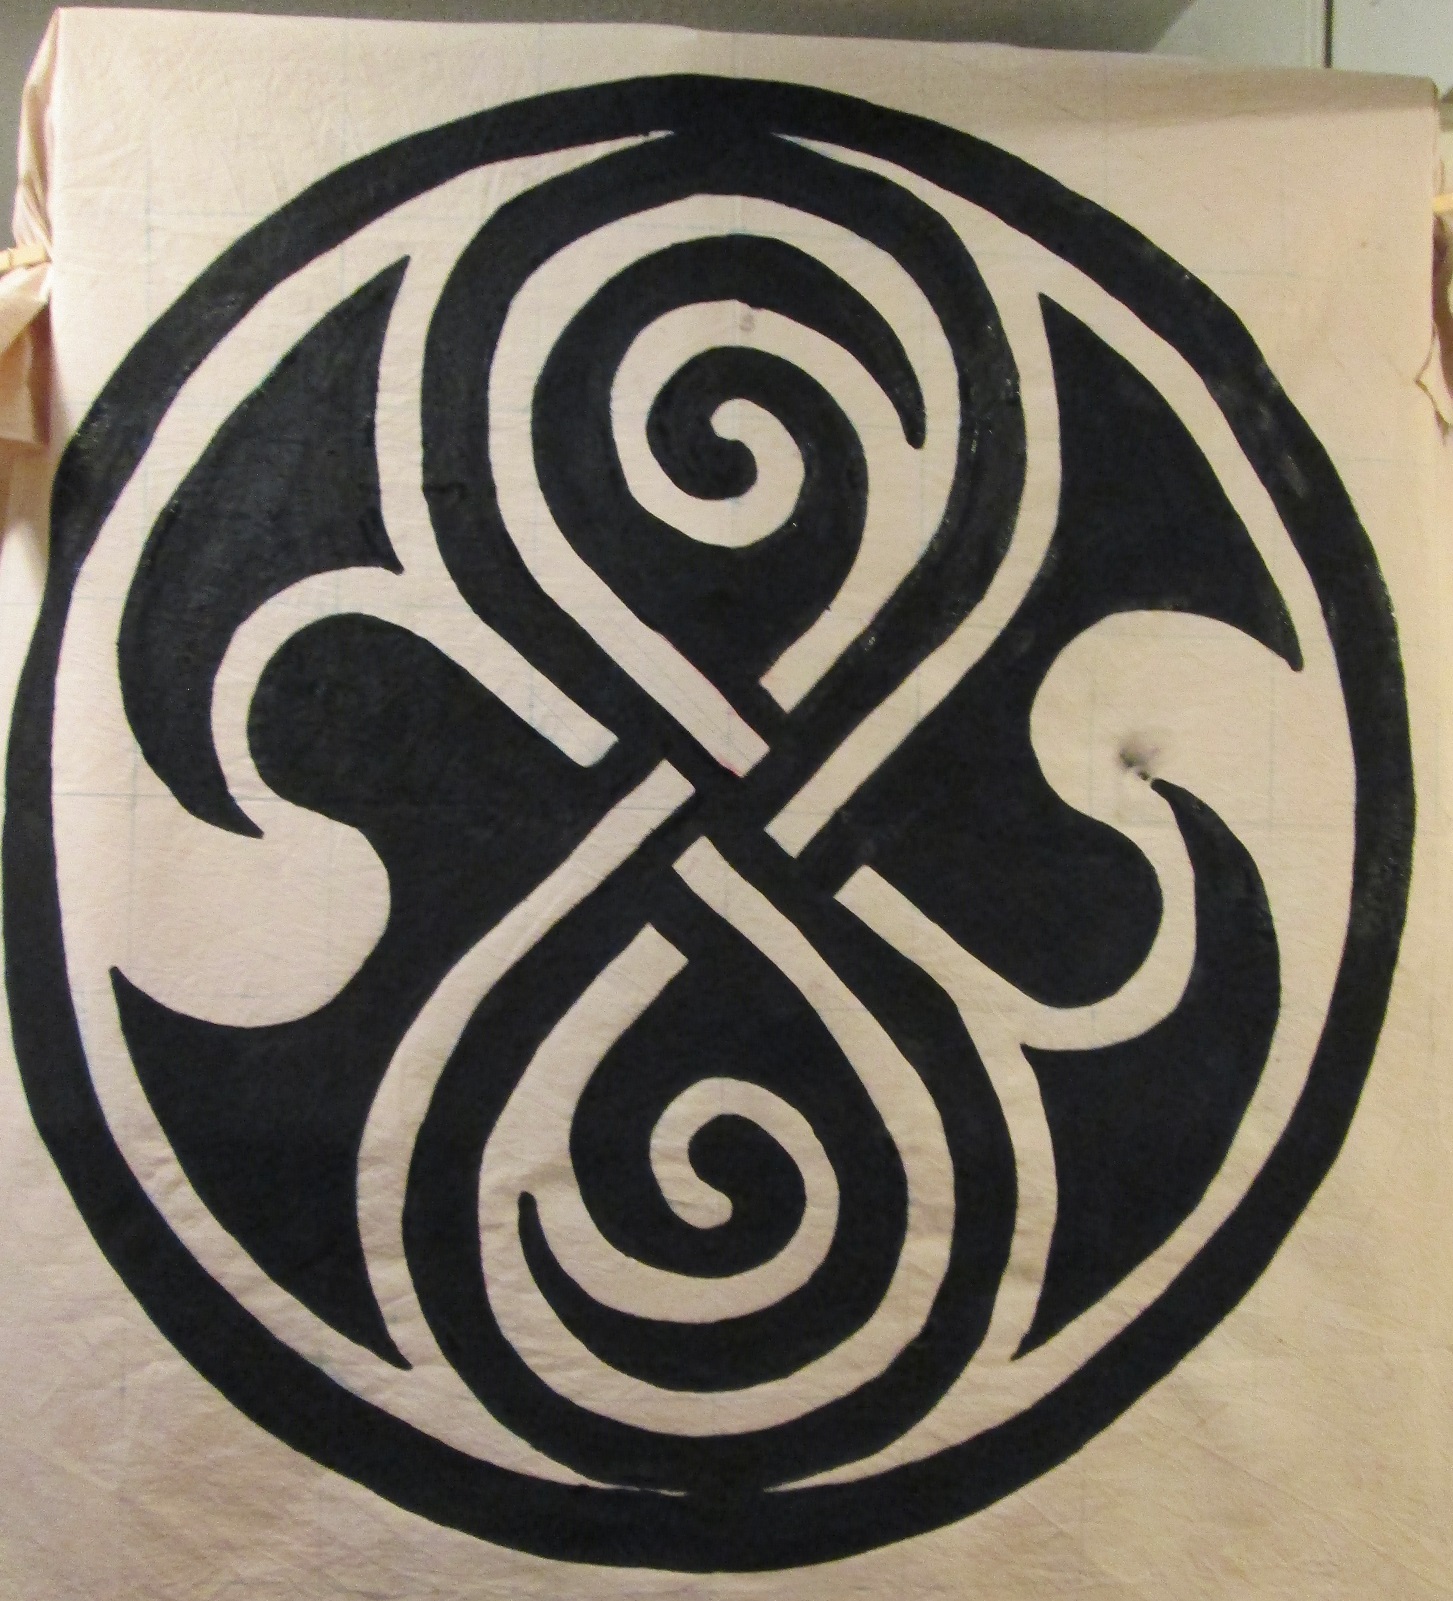
All that is left for the actual outfit is to build the Vested Basque (coat), figure out what to do for the collared shirt, and make the Ascot. After that, it’s just accessories, building a fun hair piece, and styling the wig. Speaking of accessories, I took a break from the outfit to build the parasol over the weekend. It’s made from a paper parasol I bought cheaply online, covered with muslin and fringe trim. The hardest, but also most fun/crafty bit, was transferring the Seal of Rassilon design from an 8″x8″ image to a 32″ x 32″ design on the muslin. I used a gridding method, but ended up free-handing some of the curves.

Ah. Gridding. The fact that the image is symmetrical actually made it harder.
After the first coat of paint. There are a few uneven spots, but since it is going on a parasol, I think i can be forgiven.
I’m really happy with how the parasol turned out and think it will be a fun accessory to carry around. Here’s what’s left:
- Mock up, fit, build, and trim Vest Basque Coat
- Research, and determine undershirt choices
- Build Ascot
- Build hair piece
- Fit and style wig
- Source Sonic Screwdriver
- Source Pocket watch
So things are going really well! I can’t believe Chicago TARDIS is about a month away! Holy crap! Once that is done, I need to do some design exercises, build my portfolio and start applying to grad schools (eep!). After that, I have a whole new rash of cosplays to work on! I’ve been compiling a nice list of potentials! I’ve also been bumming around the Doctor Who Cosplay forum, meeting some very awesome DW cosplayers, finding some great info, and hopefully going to get some of those fine people in the near future.
Whelp, I think that is it for now! Hopefully I’ll get some more photos together as I finish things! As always, lemme know if you want any more detailed write ups or tutorials.
Thanks kids!
-B
 Research Image


